To connect Mailchimp to your website, you need to go to Website/Funnel Settings and select Applications. After that, click on Add Application on the right side.
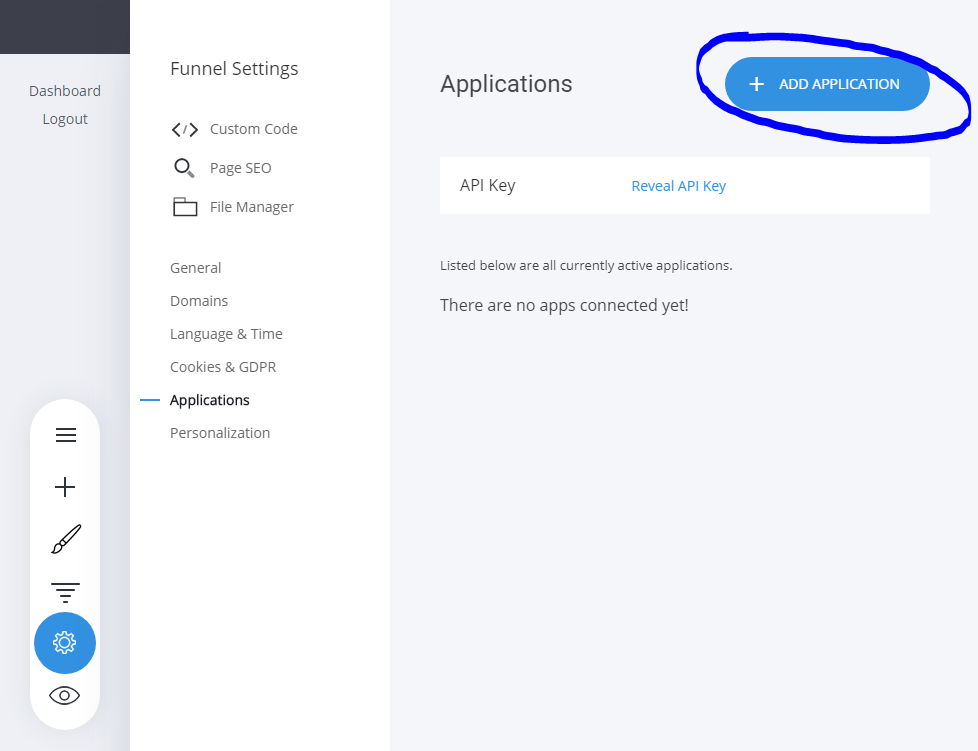
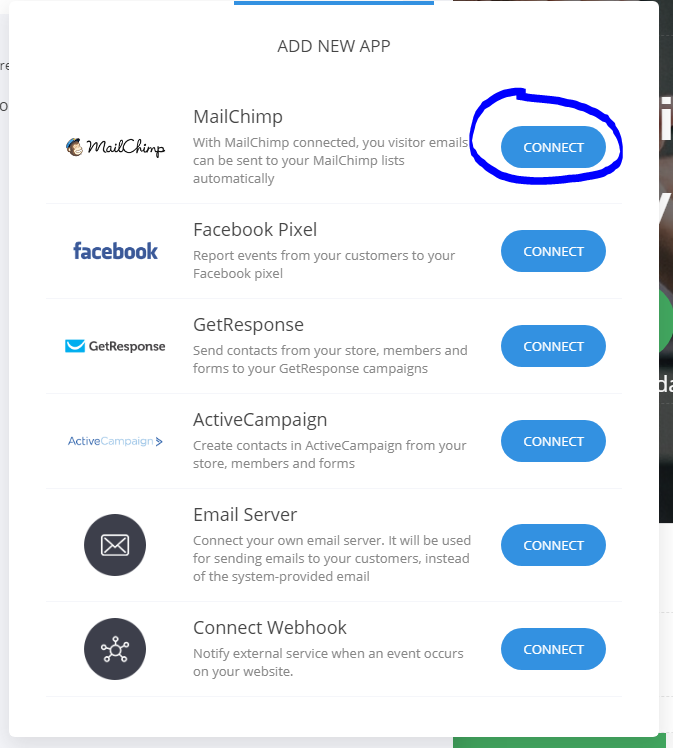
Then, click on Connect for Mailchimp integration.
If you don’t know your Mailchimp API key follow these steps:
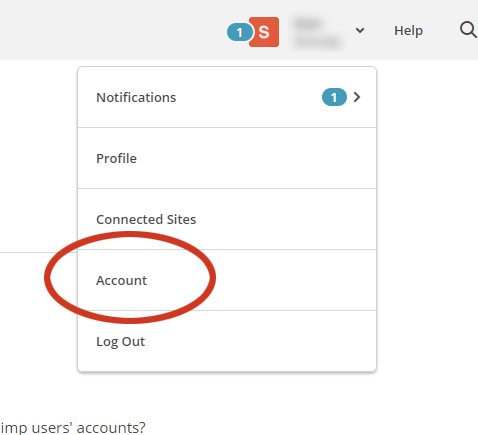
1) Log in to Mailchimp and on the top-right click on your profile and click on Account.
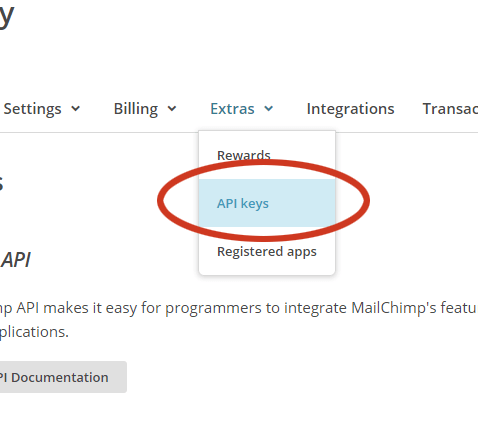
2) Click on Extras and then API keys.
3) Copy the API key and enter it in the Mailchimp popup in your builder and click on Save and Verify.

Once connected, every form, member page, or store will have the option to send the client information to Mailchimp to create your email marketing campaigns. Let’s see below how to send the inputs from a form to your Mailchimp lists.
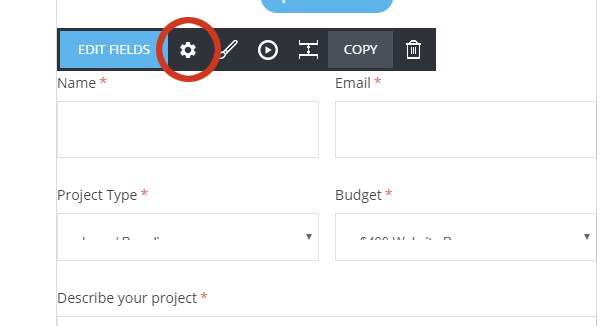
Click on a Form Widget and then on the Settings icon.
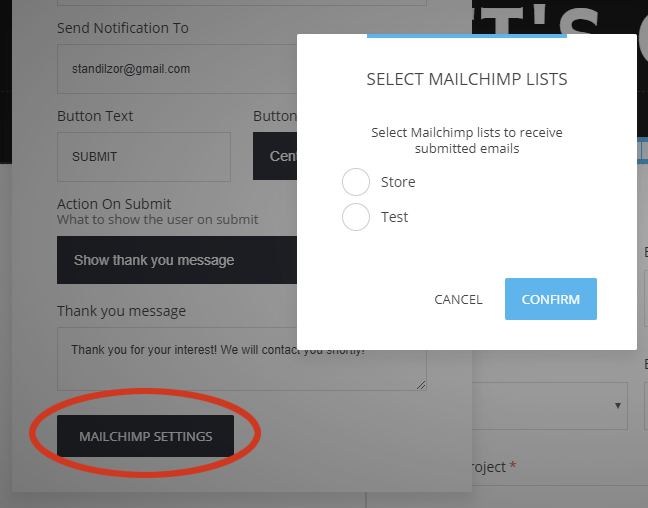
When Mailchimp is connected you will have a Mailchimp Settings button to click on that will show all your lists in your Mailchimp account. Select the list you want to send the form information to.
But how to send all the form fields to fields in your Mailchimp list? Here’s how:
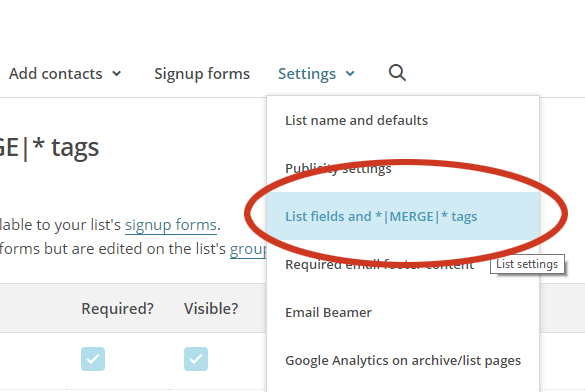
1) Go to your Mailchimp -> Lists and select the list you want to send data to. In settings, select List fields and *|MERGE|* tags.
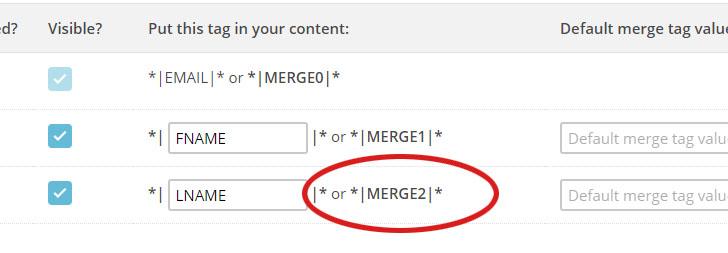
2) You will see the existing fields. To add more fields click on Add A Field. You will see that there’s a field to add a tag name. You can copy, in this case MERGE2, and paste it into the settings of the field that you want to send the data from.
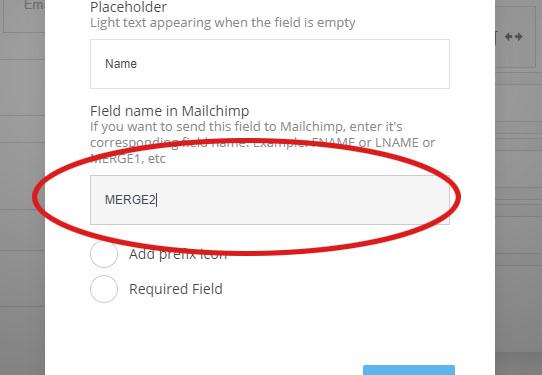
This way, all the information from each field in your form can be sent to your Mailchimp lists to the respected fields there.
